Why I Started Using Chia Jam in (Almost) Everything
The night I ran out of real jam but had chia and fruit
It was one of those nights—late, tired, but craving something sweet. I was halfway into prepping a crust for bars (the oat kind, not the fancy kind) when I realized I was out of jam. But I had overripe strawberries, a splash of lemon juice, and a little jar of chia seeds I’d bought for a smoothie phase that lasted… two days. You know the one.
So I mashed the fruit, added the chia, and crossed my fingers. By morning, it had transformed into a thick, spoonable jam with a subtle crunch and natural sweetness. No stovetop. No pectin. And no regrets.
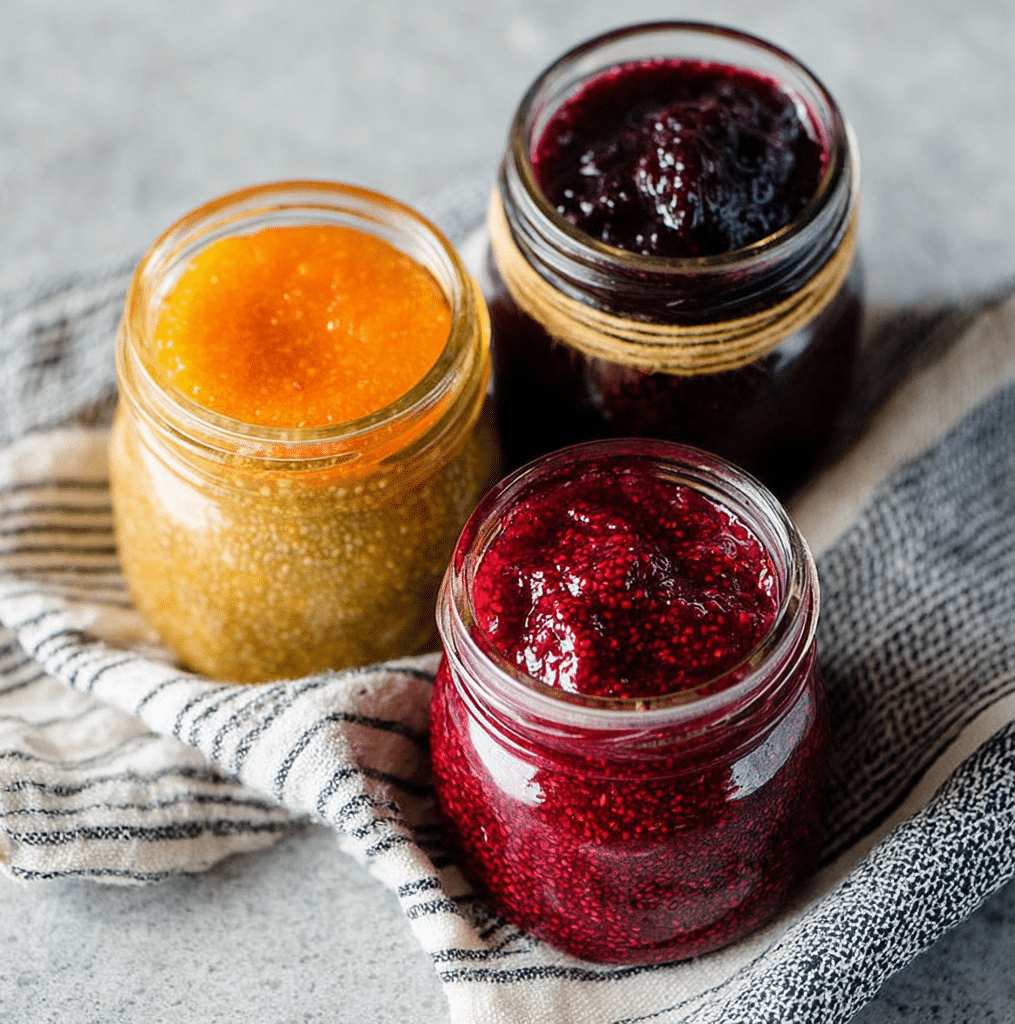
That’s when this chia jam filling guide was born. Because it turns out that jam doesn’t have to be complicated—and it definitely doesn’t need added sugar or hours of stirring. This chia jam filling guide became my go-to whenever I needed a quick fix for something fruity, flavorful, and fast.
Why this chia jam filling guide might change how you bake
Once you learn the rhythm of chia jam—how it sets, how it tastes, and how it adapts to whatever fruit’s hanging out in your fridge—you’ll start using it everywhere. I spoon it into thumbprint cookies, swirl it through oats, and layer it in chilled bars like our Chia Jam Bars. I even spooned it into the base of our No-Bake Strawberry Pie, and yes, the chia jam filling guide made that possible.
This chia jam filling guide isn’t just a technique—it’s a shortcut to jammy goodness for people who want flavor without fuss. Whether you’re experimenting or building a dessert from scratch, this is the filling that works when you’re short on time but big on flavor.
PrintChia Jam Filling Guide – Sweet Simplicity with a Spoonful of Seeds
This chia jam filling is naturally sweet, easy to prepare, and perfect for bars, tarts, or breakfast spreads—no cooking required.
- Prep Time: 5 minutes
- Cook Time: 0 minutes
- Total Time: 5 minutes (plus chilling)
- Yield: 1 cup (8 servings) 1x
- Category: Condiment
- Method: No-Cook
- Cuisine: Vegan, Plant-Based
Ingredients
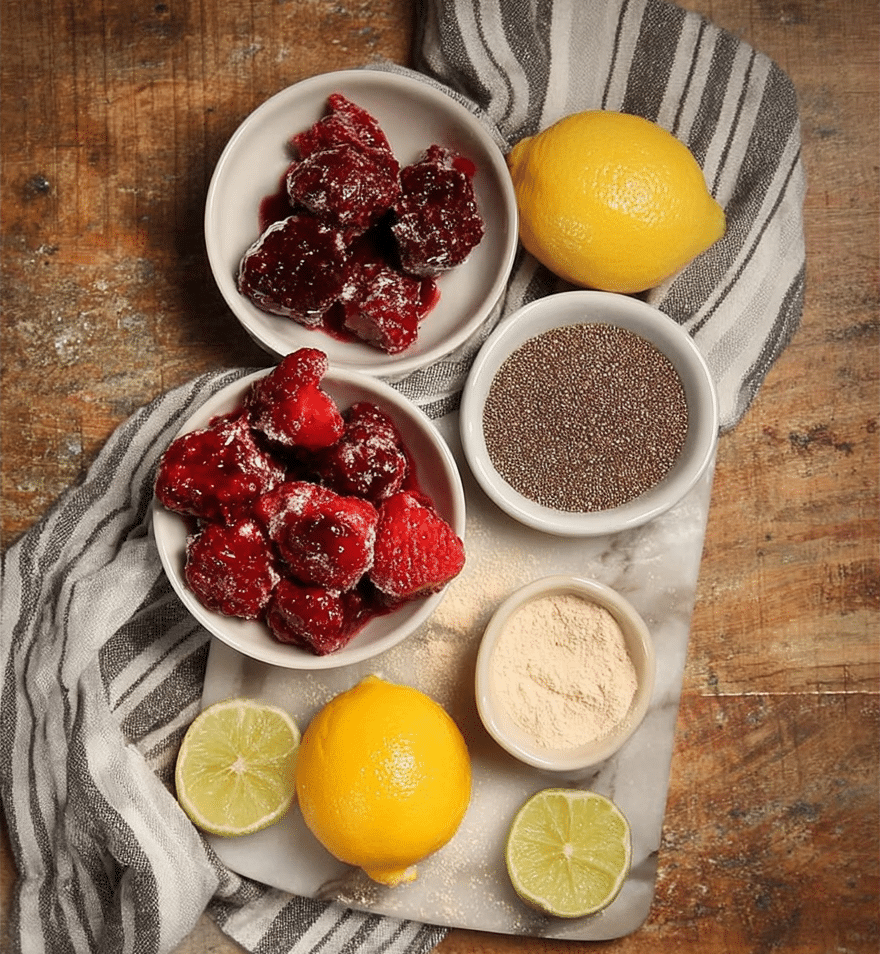
1 cup mashed fruit (strawberries, raspberries, or mixed berries)
1 tbsp lemon juice
1–2 tbsp chia seeds
1–2 tsp maple syrup (optional)
Instructions
1. Mash fruit with lemon juice until mostly smooth.
2. Stir in chia seeds and sweetener, if using.
3. Let sit for 30 minutes, stirring once or twice.
4. Transfer to jar and refrigerate for at least 1 hour.
5. Adjust consistency with more chia (thicker) or lemon juice (looser).
6. Use within 5–7 days or freeze for later.
Notes
Use frozen fruit if fresh is unavailable.
Adjust maple syrup depending on fruit sweetness.
Great in bars, pies, parfaits, or toast.
Nutrition
- Serving Size: 2 tablespoons
- Calories: 35
- Sugar: 4g
- Sodium: 0mg
- Fat: 1g
- Saturated Fat: 0g
- Unsaturated Fat: 1g
- Trans Fat: 0g
- Carbohydrates: 6g
- Fiber: 2g
- Protein: 1g
- Cholesterol: 0mg
Table of Contents
How Chia Seeds Turn into Jam Without Cooking
The gel magic that makes this work (and how to time it)
Chia seeds are little powerhouses—rich in fiber, loaded with nutrients, and, most importantly for jam-making, incredibly absorbent. When added to liquid, they form a gel-like texture in under 30 minutes. That’s the magic behind every recipe in this chia jam filling guide.
The basic process is simple: mash or blend your fruit, stir in the chia seeds, add lemon juice (for brightness and preservation), and let it sit. Within 20–30 minutes, the seeds absorb the moisture, expand, and thicken the mixture into a spoonable jam. No stovetop, no sugar thermometer, no pectin.
The longer it sits, the thicker it gets—especially after chilling in the fridge. I usually prep it at night so it’s ready by morning. If it’s too thick, stir in a teaspoon of water or lemon juice. Too thin? Add a pinch more chia and wait 10 minutes.
This method also avoids common issues in traditional jams, like overcooking or scorching. Our No-Cook Strawberry Jam shows how this chia jam filling guide helps you skip all the hard parts and still get incredible flavor.
The best fruits for chia jam: from strawberries to figs
You can use almost any soft, juicy fruit in a chia jam filling guide. Strawberries are classic, but raspberries, peaches, cherries, mangoes, and even figs all work beautifully. The key is moisture and natural sweetness—fruits that mash easily and don’t require cooking.
Frozen fruit works too. Just thaw it and drain any extra water. Chia doesn’t care if your fruit was picked yesterday or months ago—as long as there’s liquid, it’ll gel.
If using drier fruits like apples, blend them with juice first. When in doubt, pair with ingredients that complement the fruit’s texture. Layered into oat bars, spooned into parfaits, or added to baked goods, this chia jam filling guide gives you the freedom to adjust and customize as needed.
And if your first batch doesn’t turn out quite right, head over to our No-Bake Troubleshooting page—we’ve seen every jam scenario and solved them all.
Mastering Texture in Chia Jam Fillings
What to do if it’s too thin or too thick
One of the most common questions I get about any chia jam filling guide is: “Why isn’t mine the right consistency?” The answer almost always comes down to timing or ratio.
If your jam is too runny, give it more time. Chia seeds need at least 30 minutes to fully gel—but in some cases, especially with juicy fruits like strawberries or pineapple, they may need closer to an hour. Still too loose? Add another teaspoon of chia seeds, stir, and chill again. A little goes a long way.
If your jam gets too thick, stir in a teaspoon of lemon juice or water. The beauty of a good chia jam filling guide is its flexibility—you can always adjust as you go. I recommend checking consistency after chilling, not before, because chia continues to thicken even in the fridge.
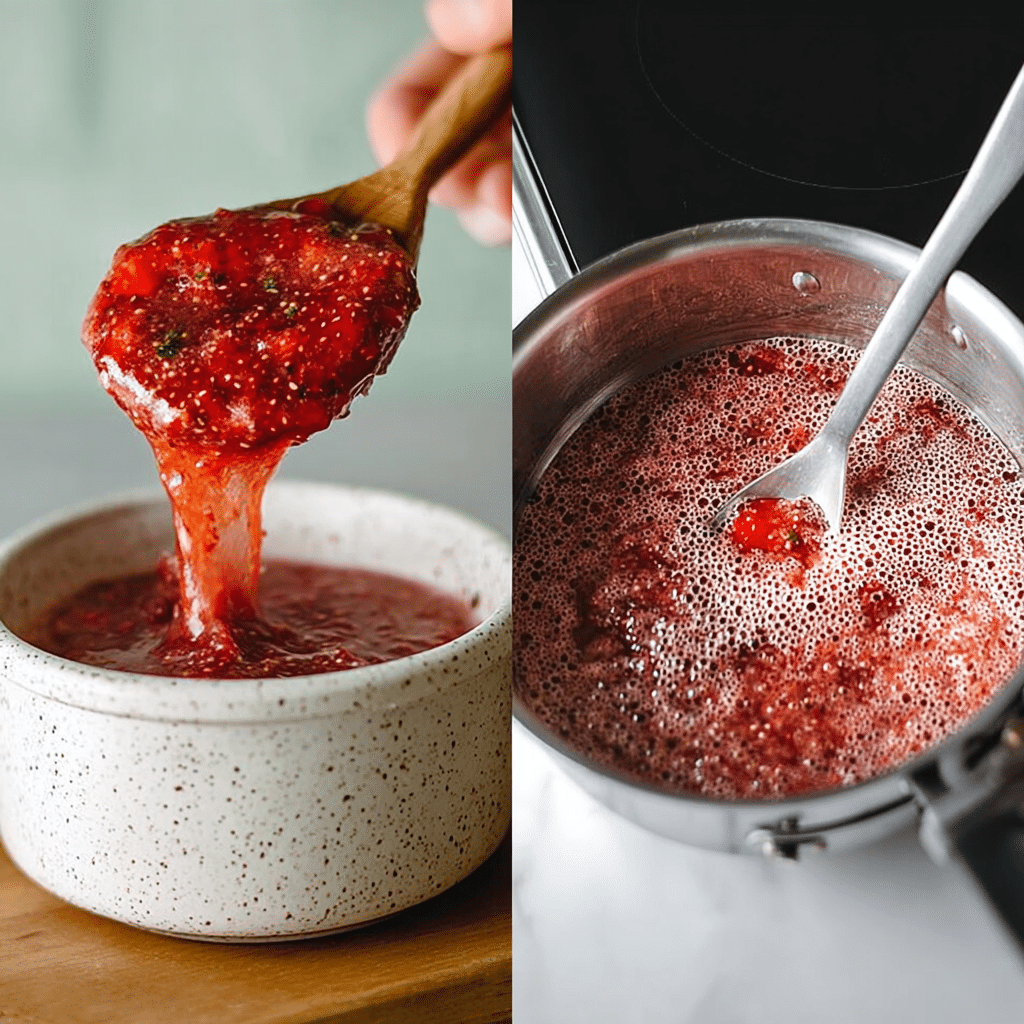
You’ll get a feel for your preferred texture over time. I like mine just thick enough to spread into a tart base or spoon into our Chia Jam Bars without it dripping. But if you’re using it as a fruit spread, a looser consistency works beautifully.
How long chia jam lasts in the fridge (and signs it’s off)
When stored in a clean jar, chia jam keeps well in the fridge for 5–7 days. The lemon juice or any added citrus helps with preservation, but since this recipe skips sugar and heat, it won’t last forever. This is another place where a solid chia jam filling guide is handy—it helps you use what you make before it loses flavor or texture.
You’ll know it’s past its prime if the color darkens, it smells sour, or mold starts to appear. Don’t risk it—toss and make a fresh batch. Thankfully, this jam comes together so fast you can whip up a new one in under 10 minutes.
For those prepping ahead, chia jam freezes surprisingly well. Spoon it into silicone molds or ice cube trays for small, ready-to-go portions. Let it thaw in the fridge overnight before using. I do this when prepping layers for desserts like those in our Vegan Desserts roundup—it saves time and adds flavor without the last-minute rush.
With a little care, this chia jam filling guide turns your fridge into a ready-made jam bar—and your recipes into flavor-packed showstoppers.
From Bars to Pies: Where to Use This Chia Jam
Chia Jam Bars, tart fillings, thumbprints & yogurt cups
Once you’ve got a jar of homemade jam from this chia jam filling guide, the real fun begins—figuring out where to spoon it. Let’s start with the obvious: Chia Jam Bars. These are one of my go-to desserts. You press a crust into the pan, spoon in your jam, crumble more crust on top, and chill or bake depending on your mood. The chia holds up beautifully.
But this filling goes way beyond bars. Use it in vegan thumbprint cookies—it sets gently, doesn’t spill out during baking, and adds a bright pop of color. Spoon it into chilled tart crusts, spread it on pancakes, or layer it into yogurt cups. It also works as a refined sugar–free spread for toast or swirled into overnight oats. Honestly, once you make it, it ends up in every corner of your kitchen.
This chia jam filling guide is meant to help you build more than just one dessert—it gives you a foundation for layering, scooping, swirling, and spreading across dozens of plant-based recipes.
Best pairings with our No-Bake Strawberry Pie & No-Cook Strawberry Jam
Some of the best uses of this jam happen when you think of it like a second layer or secret pocket of flavor. In our No-Bake Strawberry Pie, for example, a thin spread of chia jam beneath the cream layer gives it structure and an extra punch of berry goodness. It firms up well, which means clean slices every time.
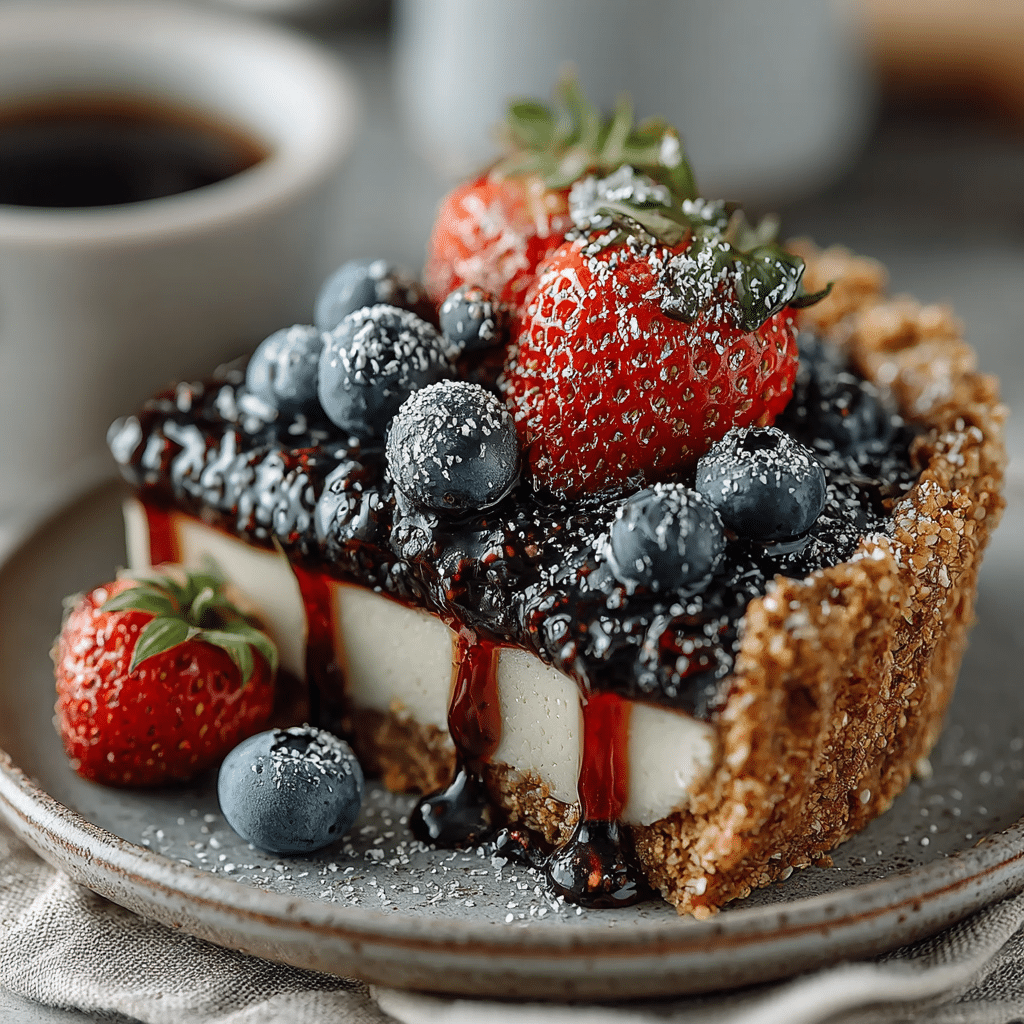
Another favorite pairing? Add a dollop of chia jam alongside our No-Cook Strawberry Jam on toast or scones. The difference in texture—one thick and gelled, the other smooth and syrupy—makes for a simple but striking combo.
Because of the flexibility in this chia jam filling guide, you can decide how thick or smooth to make your spread depending on what you’re layering it into. Want something spoonable for cups? Loosen it with a bit more lemon. Want it firm for a tart base? Let it gel overnight.
Once you start treating chia jam as more than a substitute—once you treat it as a featured ingredient—you unlock more than recipes. You unlock rhythm. And the rhythm of no-bake layering starts right here.
FAQs About Chia Jam Filling
What should not be eaten with chia seeds?
Avoid combining chia seeds with extremely dry foods or fiber supplements without fluids. Since chia absorbs a lot of moisture, eating it dry could cause digestive discomfort. In this chia jam filling guide, we always recommend hydrating chia fully in fruit purée or liquids before consuming.
How long will chia jam last in the fridge?
Chia jam typically lasts about 5–7 days when stored in an airtight container. It’s best to refrigerate immediately after making it. As we explained earlier in this chia jam filling guide, you can also freeze it in small portions to keep it longer.
What are the side effects of chia seeds soaked in water?
Most people tolerate soaked chia seeds well, but large amounts may cause bloating in sensitive individuals due to the high fiber content. Always introduce it slowly, especially if you’re new to high-fiber foods.
How much chia seeds to thicken jam?
Use 1 to 2 tablespoons of chia seeds per 1 cup of mashed or blended fruit. This ratio ensures the right consistency without overpowering the taste or texture. Our chia jam filling guide provides adjustments if your jam turns out too thin or too firm.
For visual inspiration and more culinary ideas, connect with other food enthusiasts and exchange ideas. Follow us on Pinterest and Medium. You’ll discover stunning presentations and helpful tips to perfect your dishes!
Final Thoughts: Let This Chia Jam Filling Guide Be Your Shortcut to Better Sweets
If you’ve ever skipped making jam because it felt too time-consuming or too precise, this chia jam filling guide is your permission slip to make something simple, flavorful, and fast. With just a few ingredients and no cooking, you can create fillings for tarts, bars, and breakfast treats that feel homemade—and are.
What I love most about this process is how forgiving it is. Once you get the feel for chia seed ratios and fruit texture, you can riff endlessly—raspberries in summer, pears in winter, stone fruits when they’re at their peak. Keep a jar in your fridge, freeze it for later, or layer it right into your next no-bake dessert.
This chia jam filling guide doesn’t just save you time. It gives you confidence, creativity, and a tool you’ll reach for again and again—whether you’re prepping breakfast or building a pie from scratch.
